Docs / EMIS
Getting started
This article will take you through getting your EMISWeb setup with Hero.
Purpose
This guide shows how to:
Create a dedicated EMIS user (Herouser)
Activate Hero Health in EMAS Manager
Generate the API password needed for the Hero connection form
Create the Hero unregistered patient appointment slot type
Recommended: Watch the short walkthrough video first, then follow the steps below carefully to avoid connection failures.
Video walkthrough
Before you start (IMPORTANT)
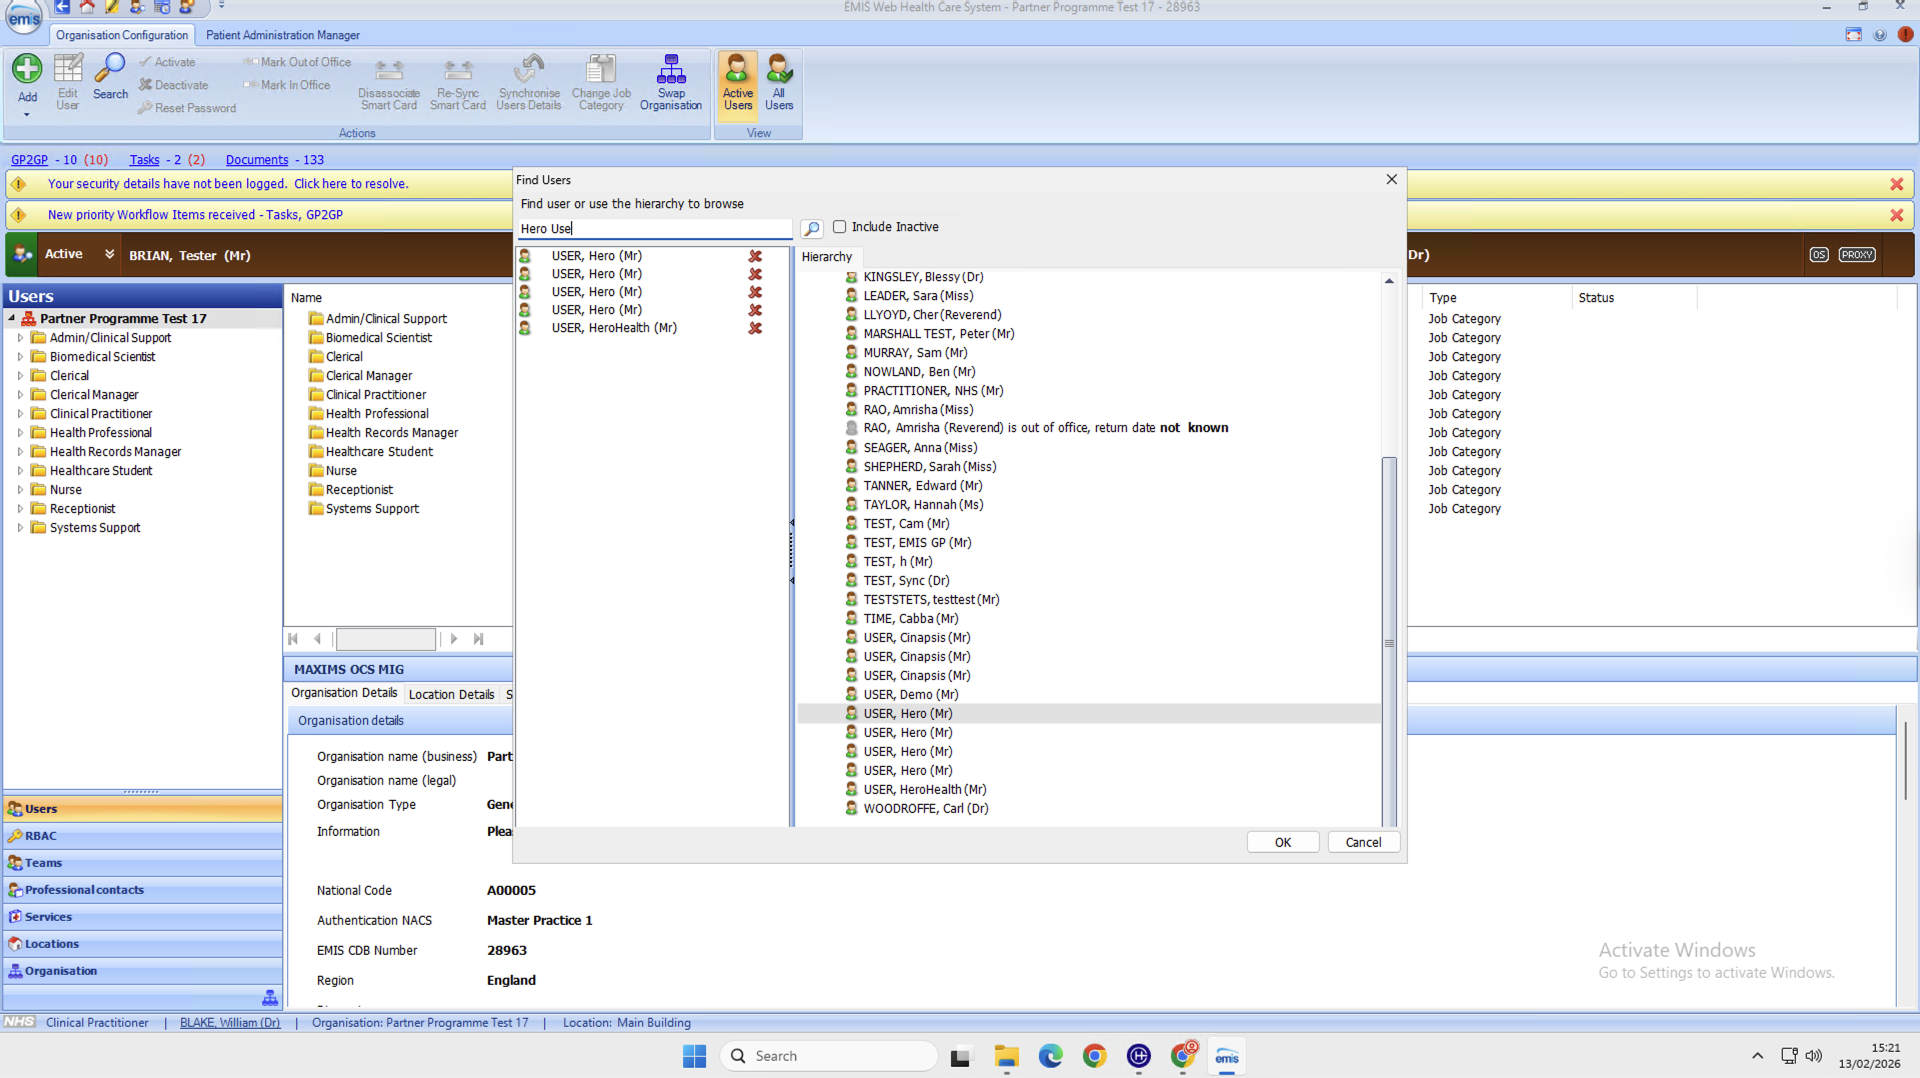
1) Check if Herouser already exists
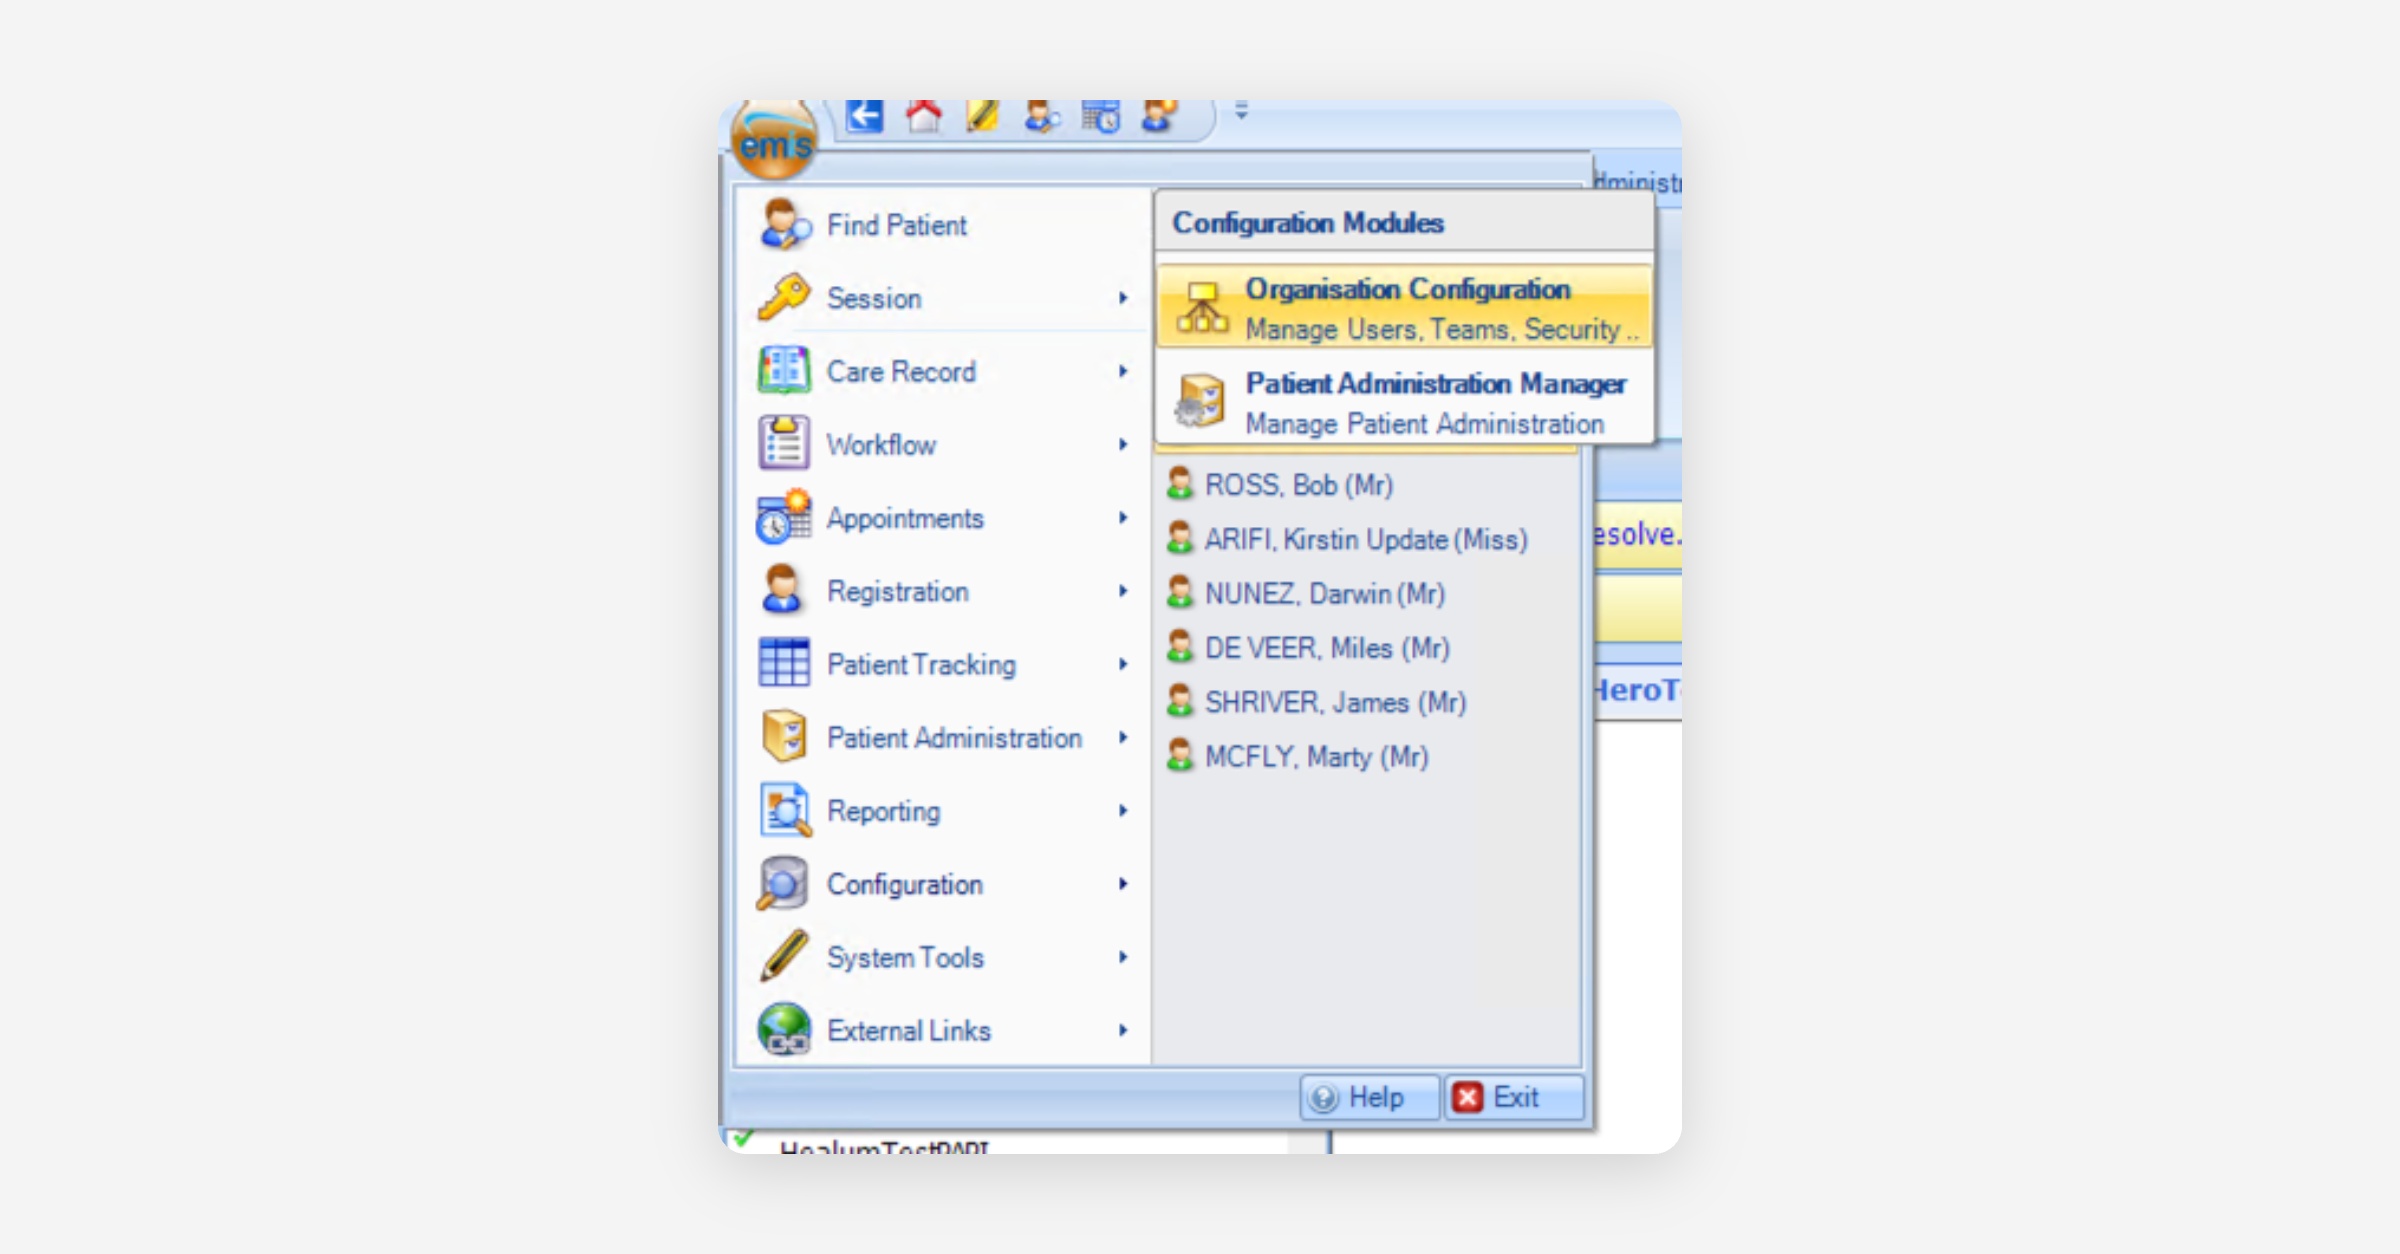
Go to:
EMIS ball → Configuration → Organisation Configuration → Users
Search for:
HerouserHerouser1any “Hero” users
If you find an existing Herouser:
Stop the setup and send Hero your ODS code. We may already have a live connection and can advise whether you need a new user.
2) If this is your second attempt (because the first failed)
You can create a new user e.g. Herouser1 (or Herouser2).
Do not delete the original Herouser until Hero confirms which credentials should remain.
Step 1 of 3: Configure an EMIS user (Herouser)
Create the user
Go to:
EMIS ball → Configuration → Organisation Configuration
Navigate to Users
Click Add
Click Add new user
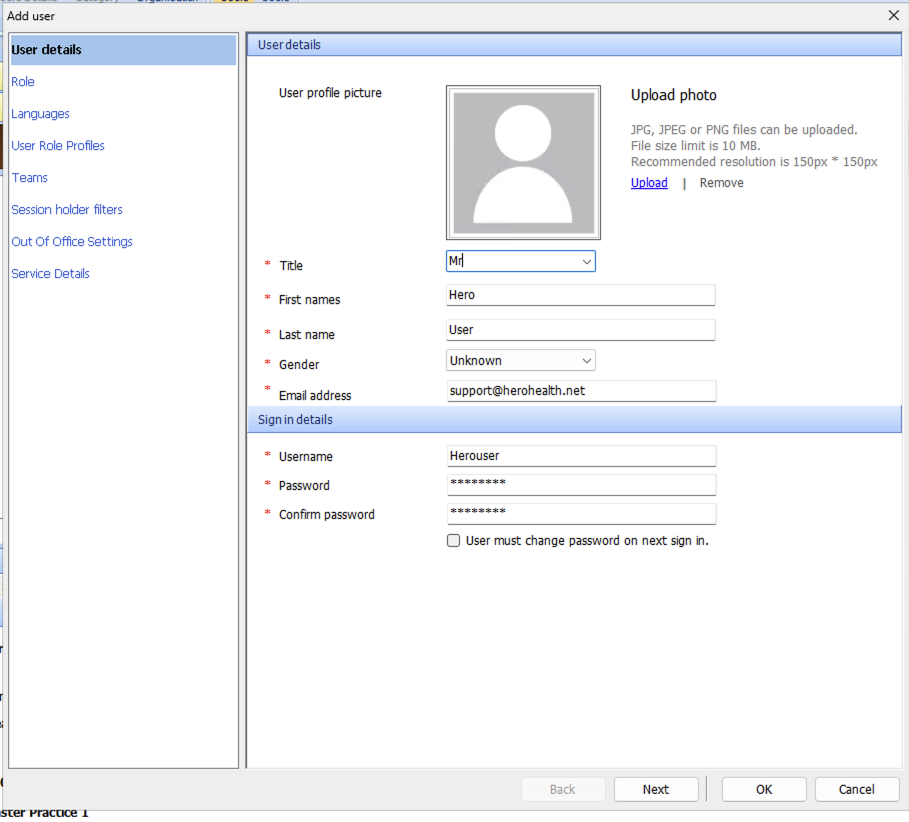
Create the user with the following details:
Title: Mr
First name: Hero
Last name: User
Gender: Not specified
Email: [email protected]
Username:
Herouser(orHerouser1if second attempt)Password: Choose a secure password
Untick: “User must change password on next sign in”
Important: This password is the EMIS user password.
It is NOT the API password and is usually NOT the one you enter on the Hero connection form.
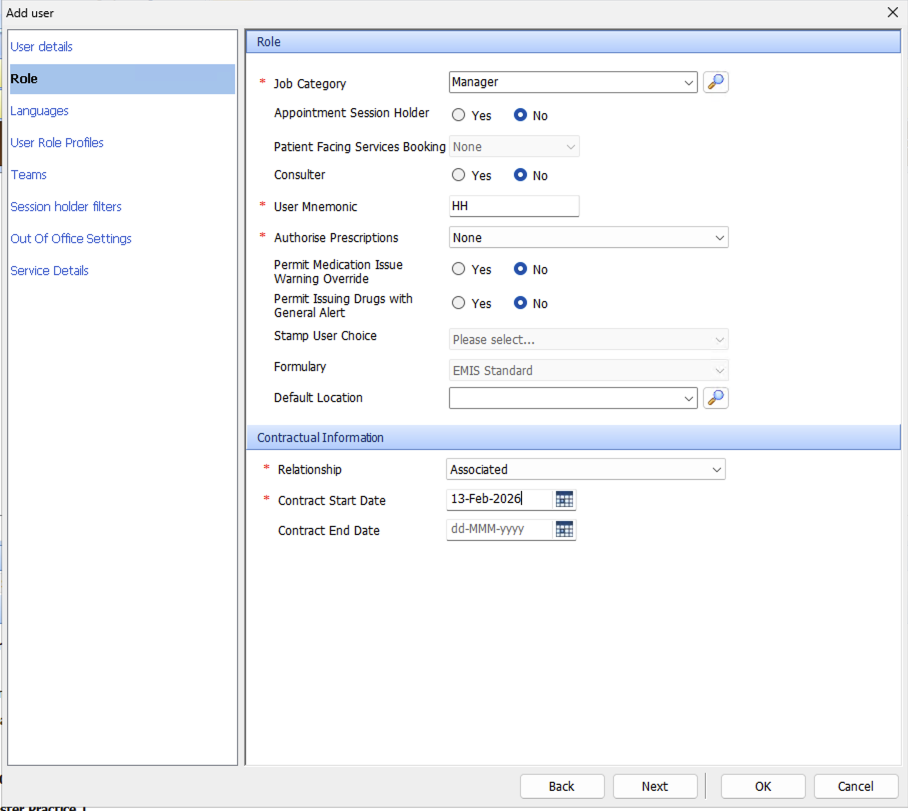
Set a role
Open the Role tab (left-hand menu) and set:
Job Category: Manager
User Mnemonic: HH (or your preferred)
Authorise Prescriptions: None
Relationship: Associated
Contract start date: Today’s date
Contract end date: Do not set one (leave blank)
Add user role profile (RBAC)
Open User Role Profile and set:
RBAC role: Practice Manager SJR004

Click "OK” and create the user
Step 1 complete - record these
✅ Save:
Username (Herouser / Herouser1)
EMIS user password (the one you set during user creation)
Step 2 of 3: Activate Partner API (EMAS Manager)
Activate Hero Health
Go to:
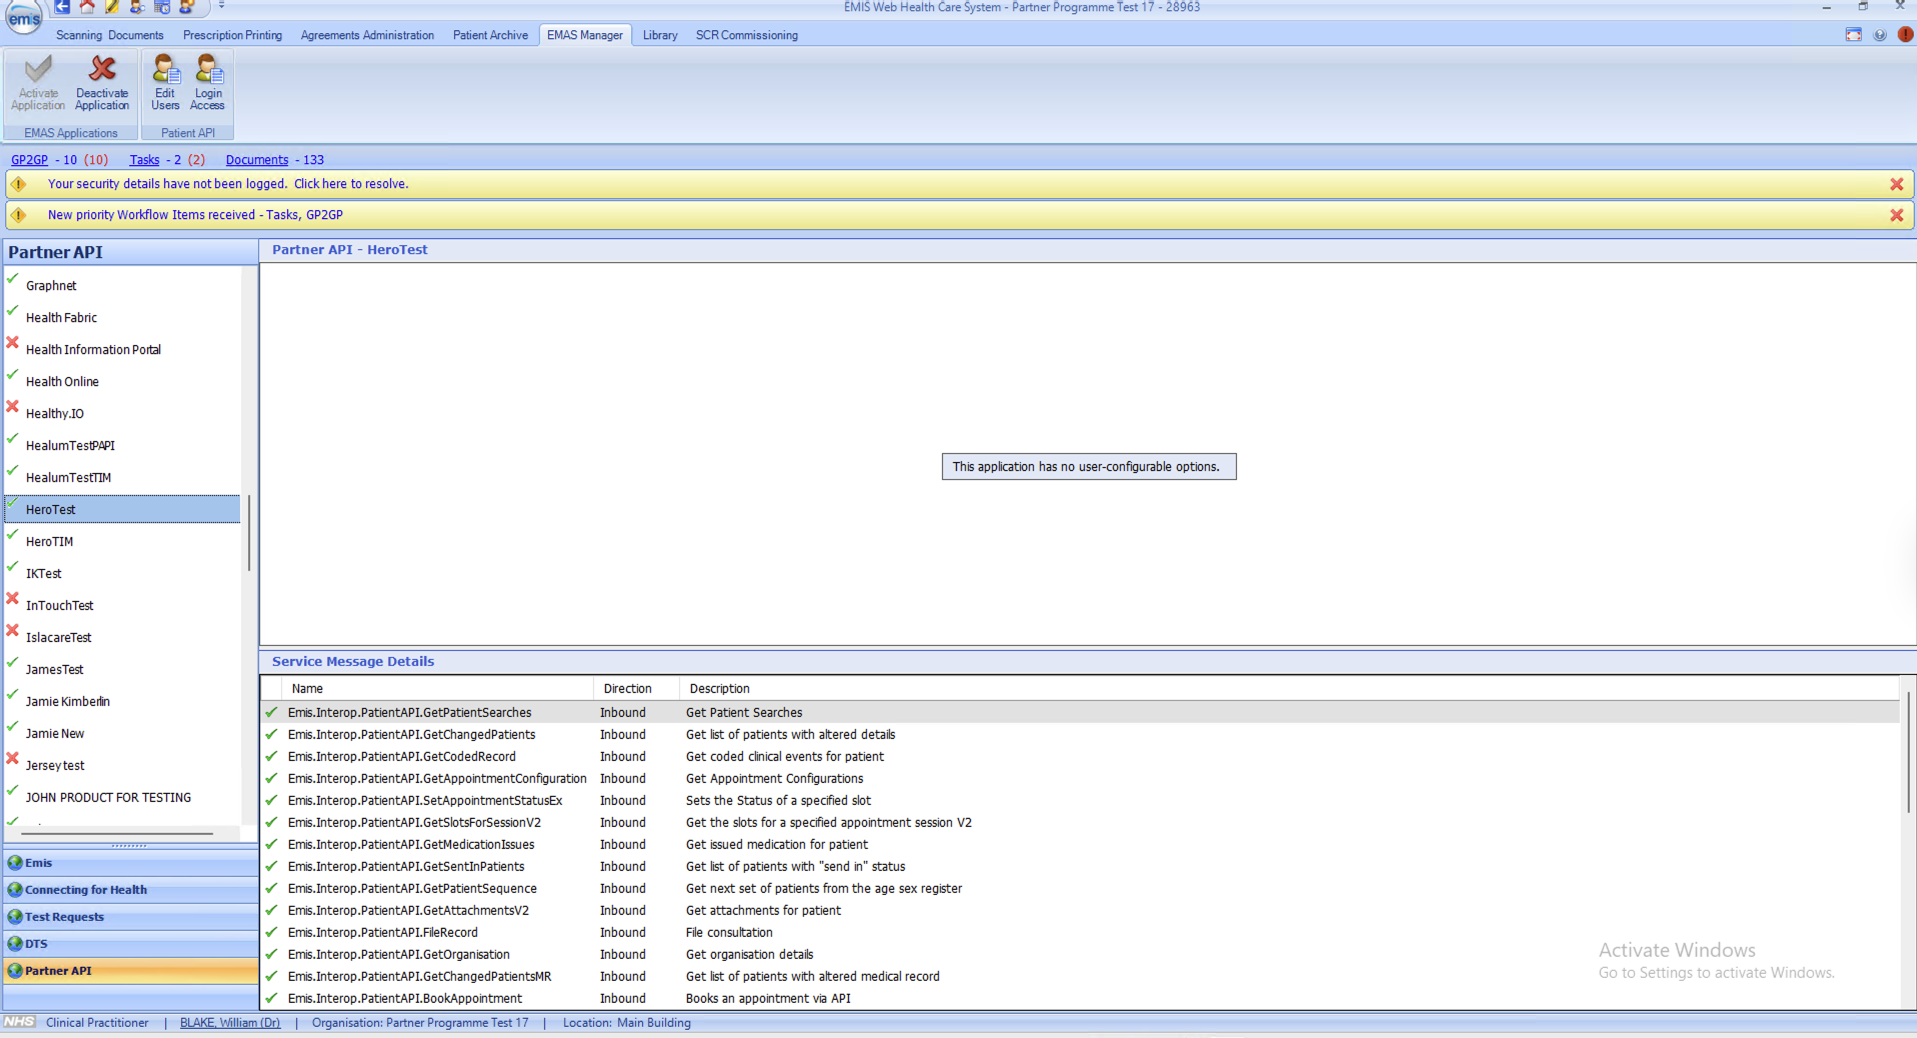
EMIS ball → System Tools → EMAS Manager
Then:
Scroll the list of Partner products
Select Hero Health (appears as “Hero Test” in screenshot below due to test environment)
Click Activate Application (toolbar)
You should see a green tick next to Hero Health.
If you can’t access EMAS Manager
Confirm that your admin account has RBAC activity:
This can be added, or ask your system administrator for help:
Activate user access (THIS CREATES THE API PASSWORD)
With Hero Health selected:
Click Edit Users (toolbar)
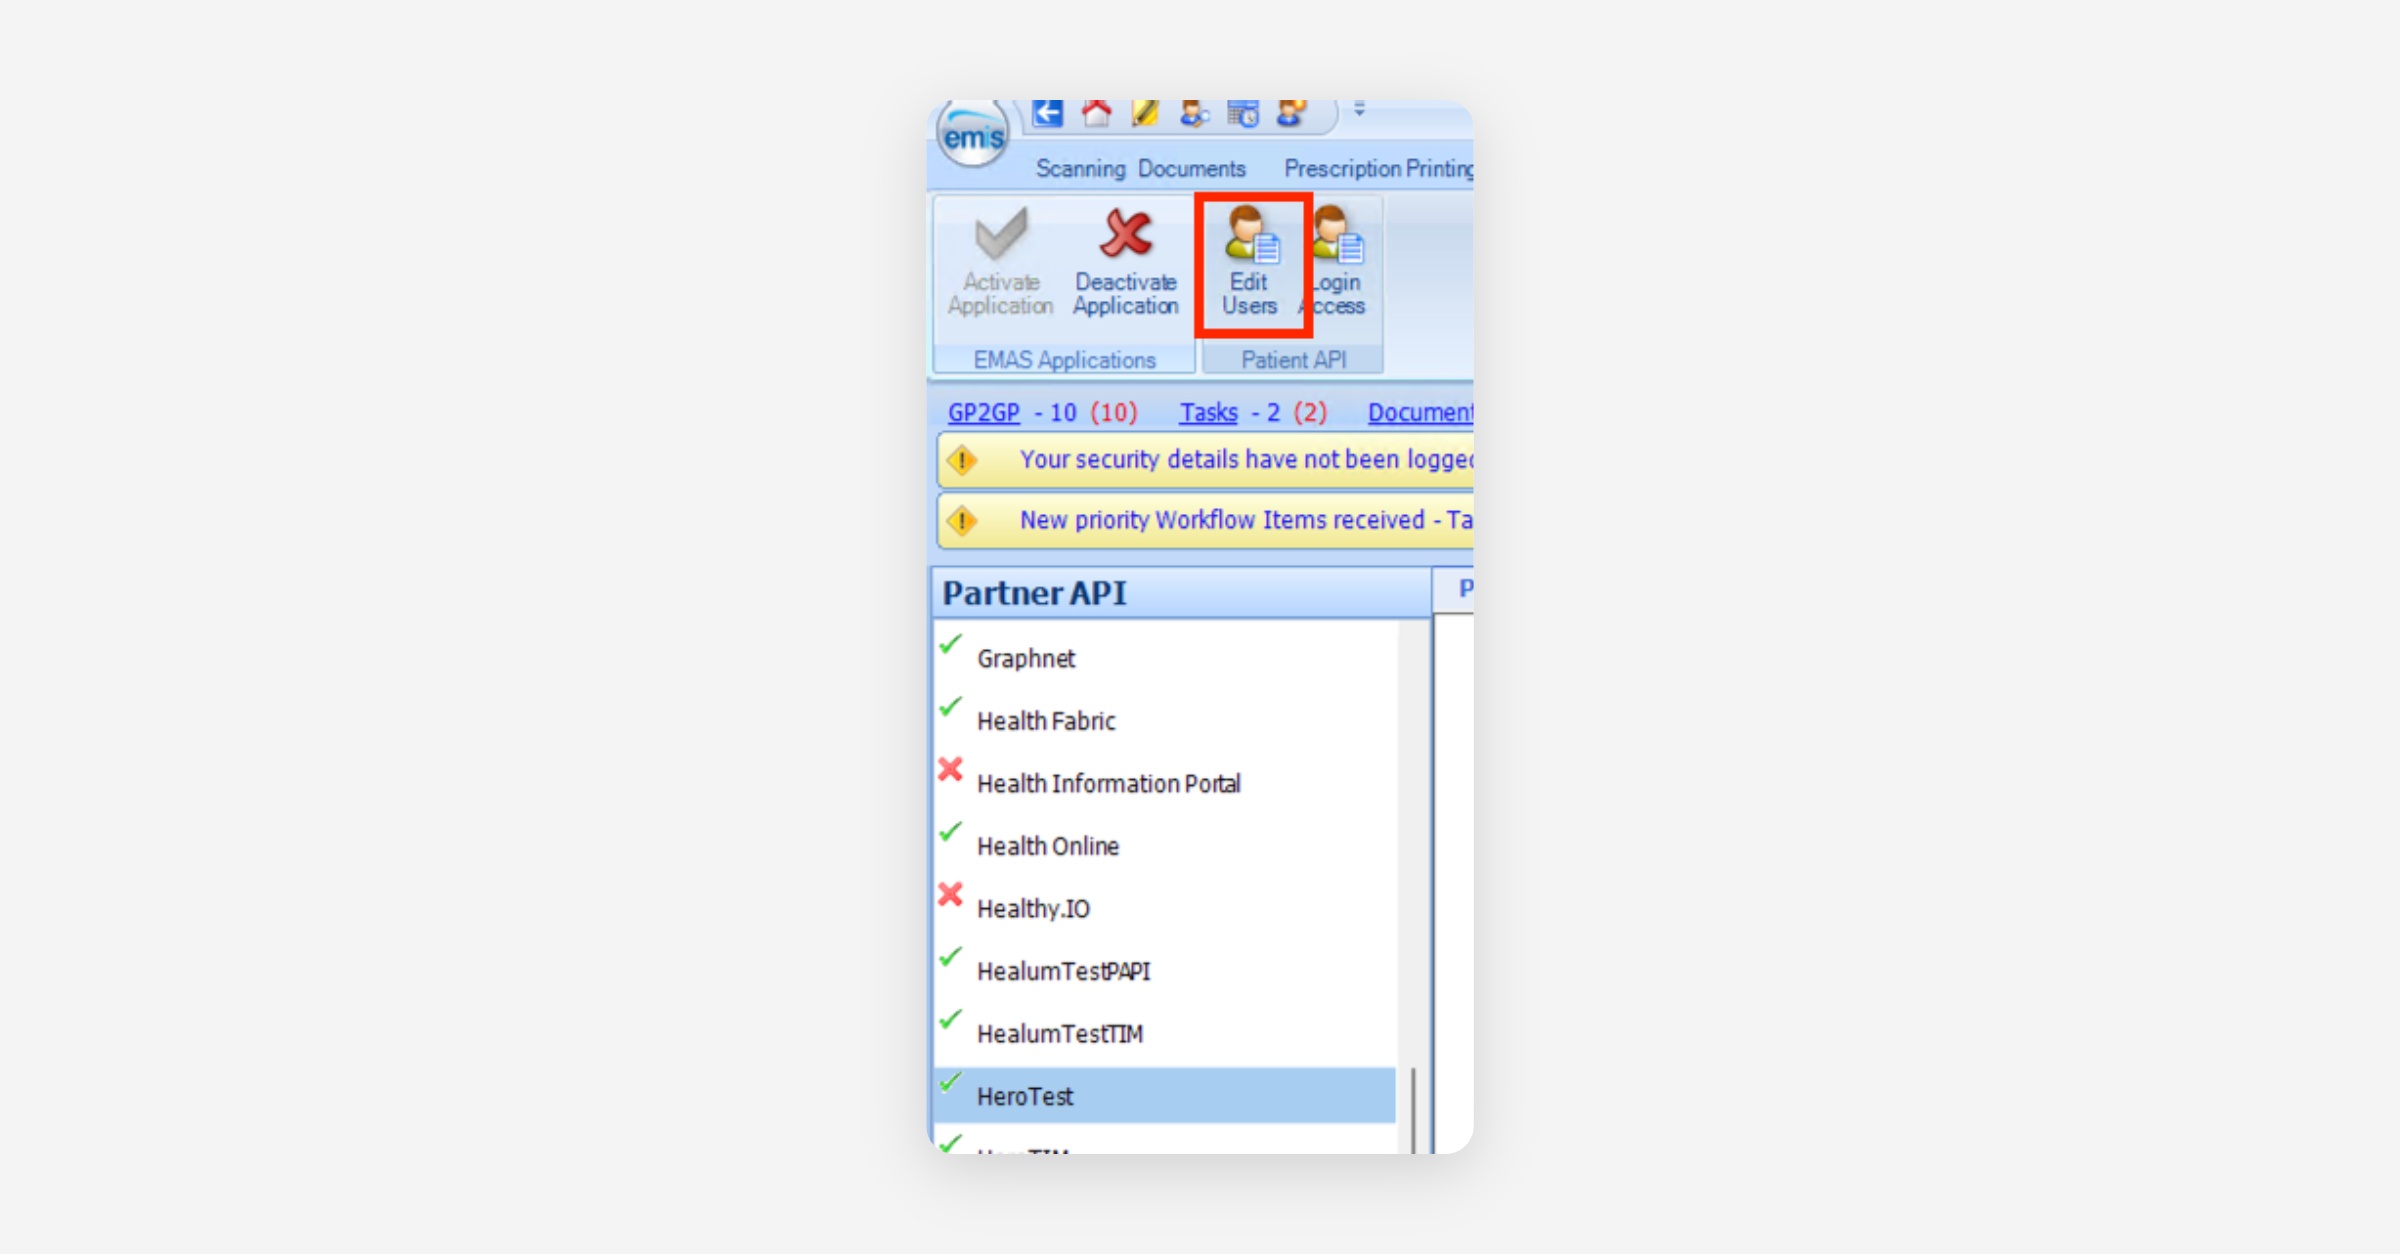
Find the EMIS user created in Step 1 (name usually appears as “User, Hero”)
Tick the checkbox next to their name
You will be prompted to enter a password
This password is the API password
The password entered here is the API password.
This IS what you enter on the Hero connection form.
Critical note: You typically cannot view this API password later.
If it’s lost or typed incorrectly, you’ll need to repeat the process / change it in EMAS Manager.
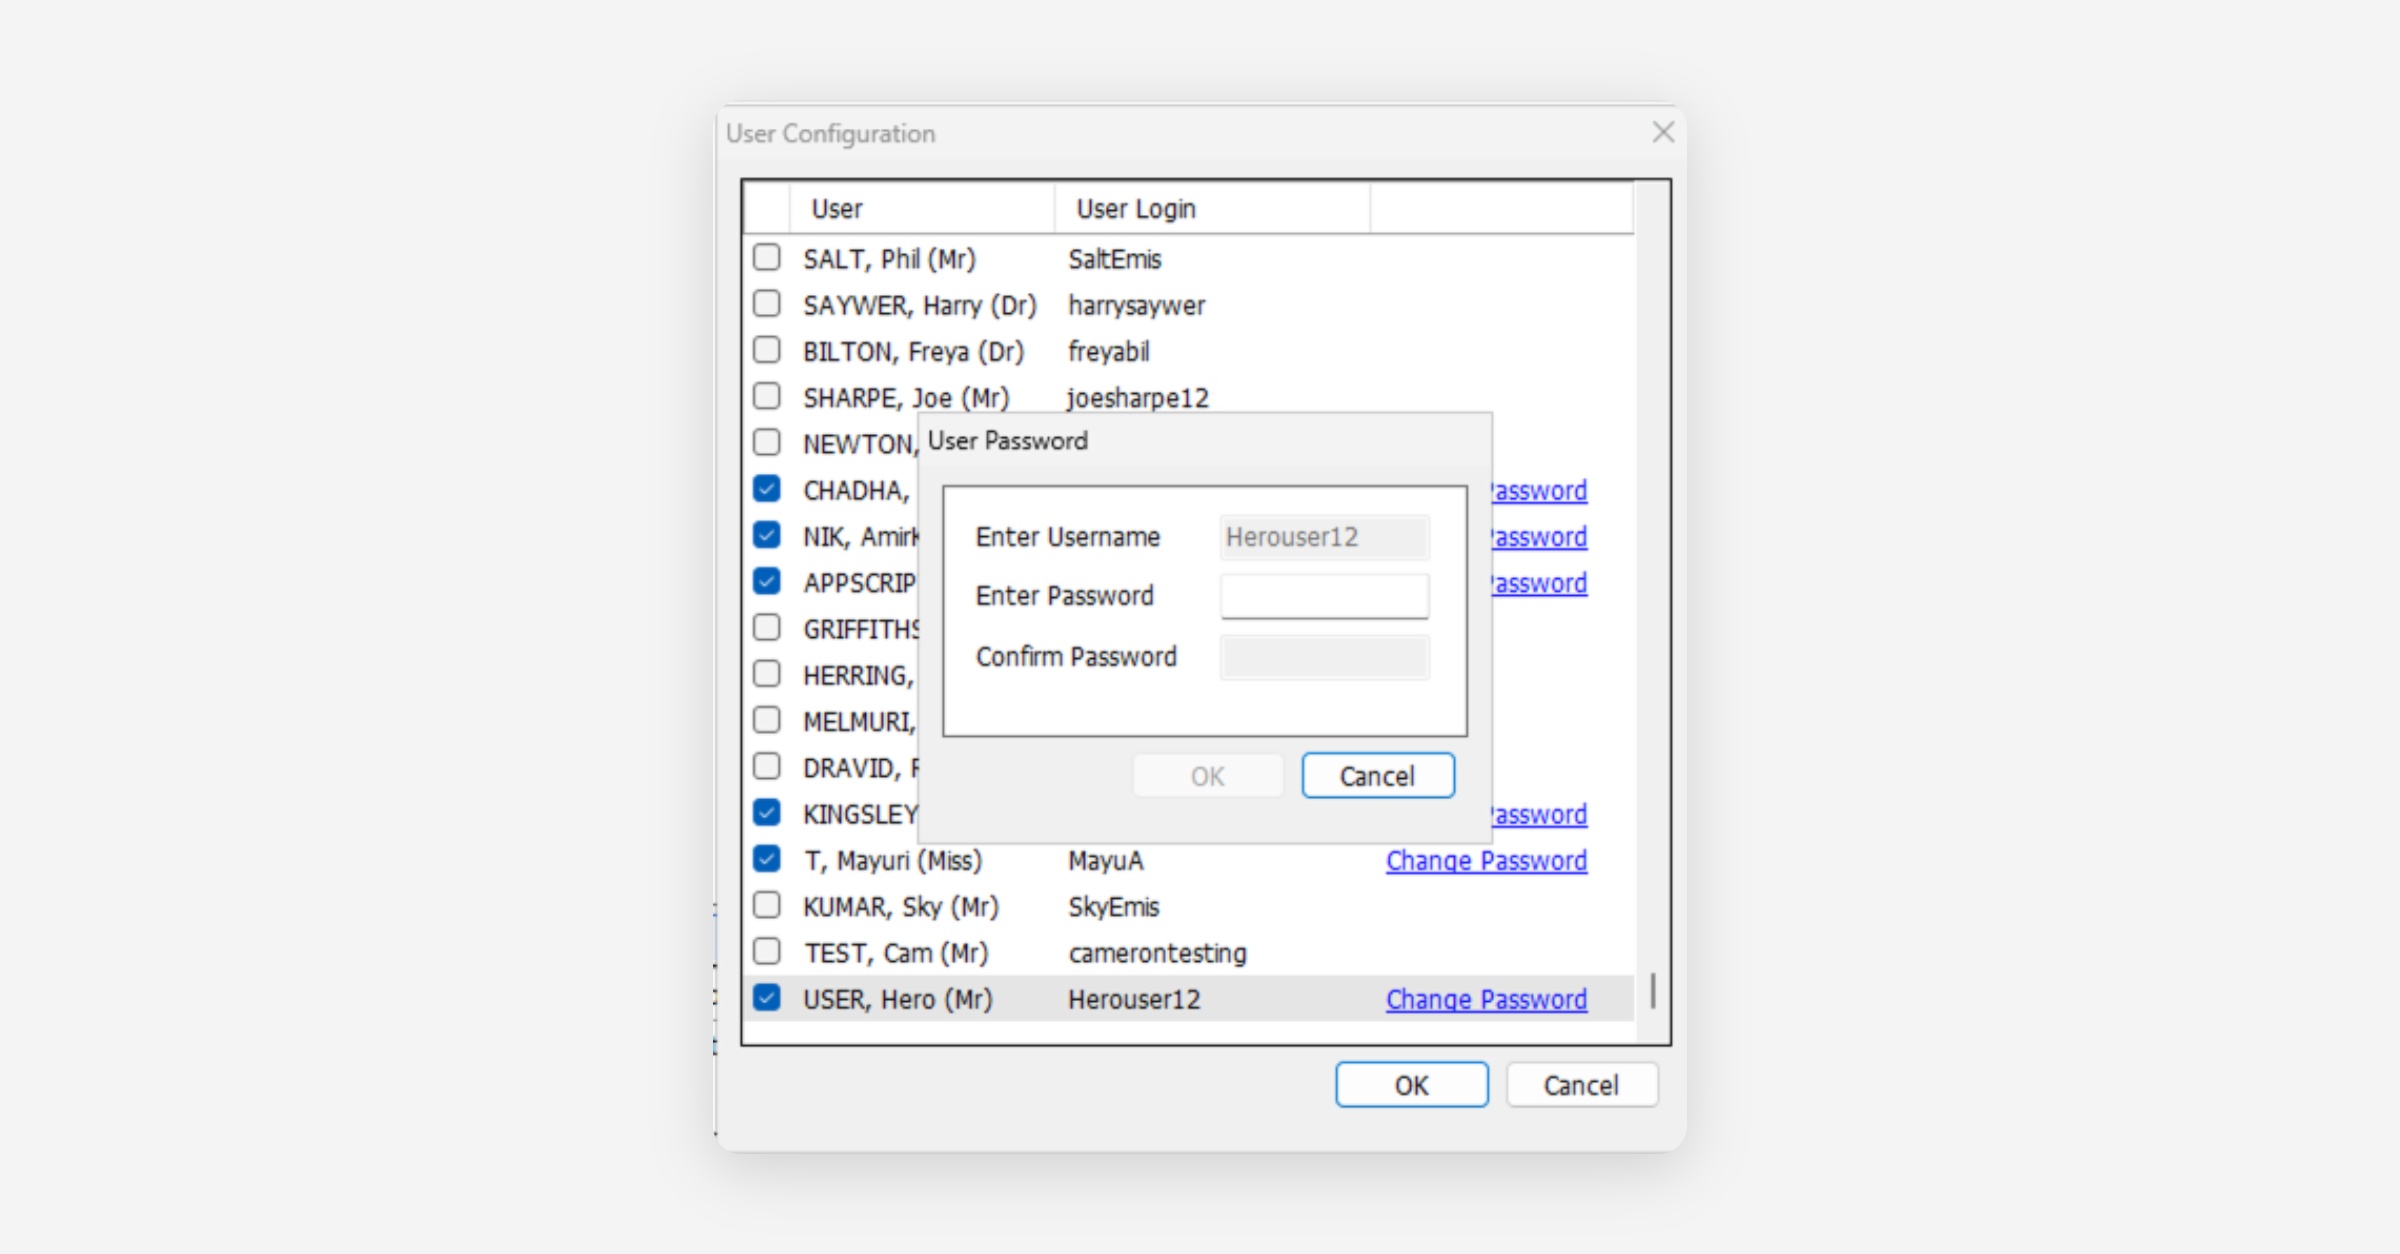
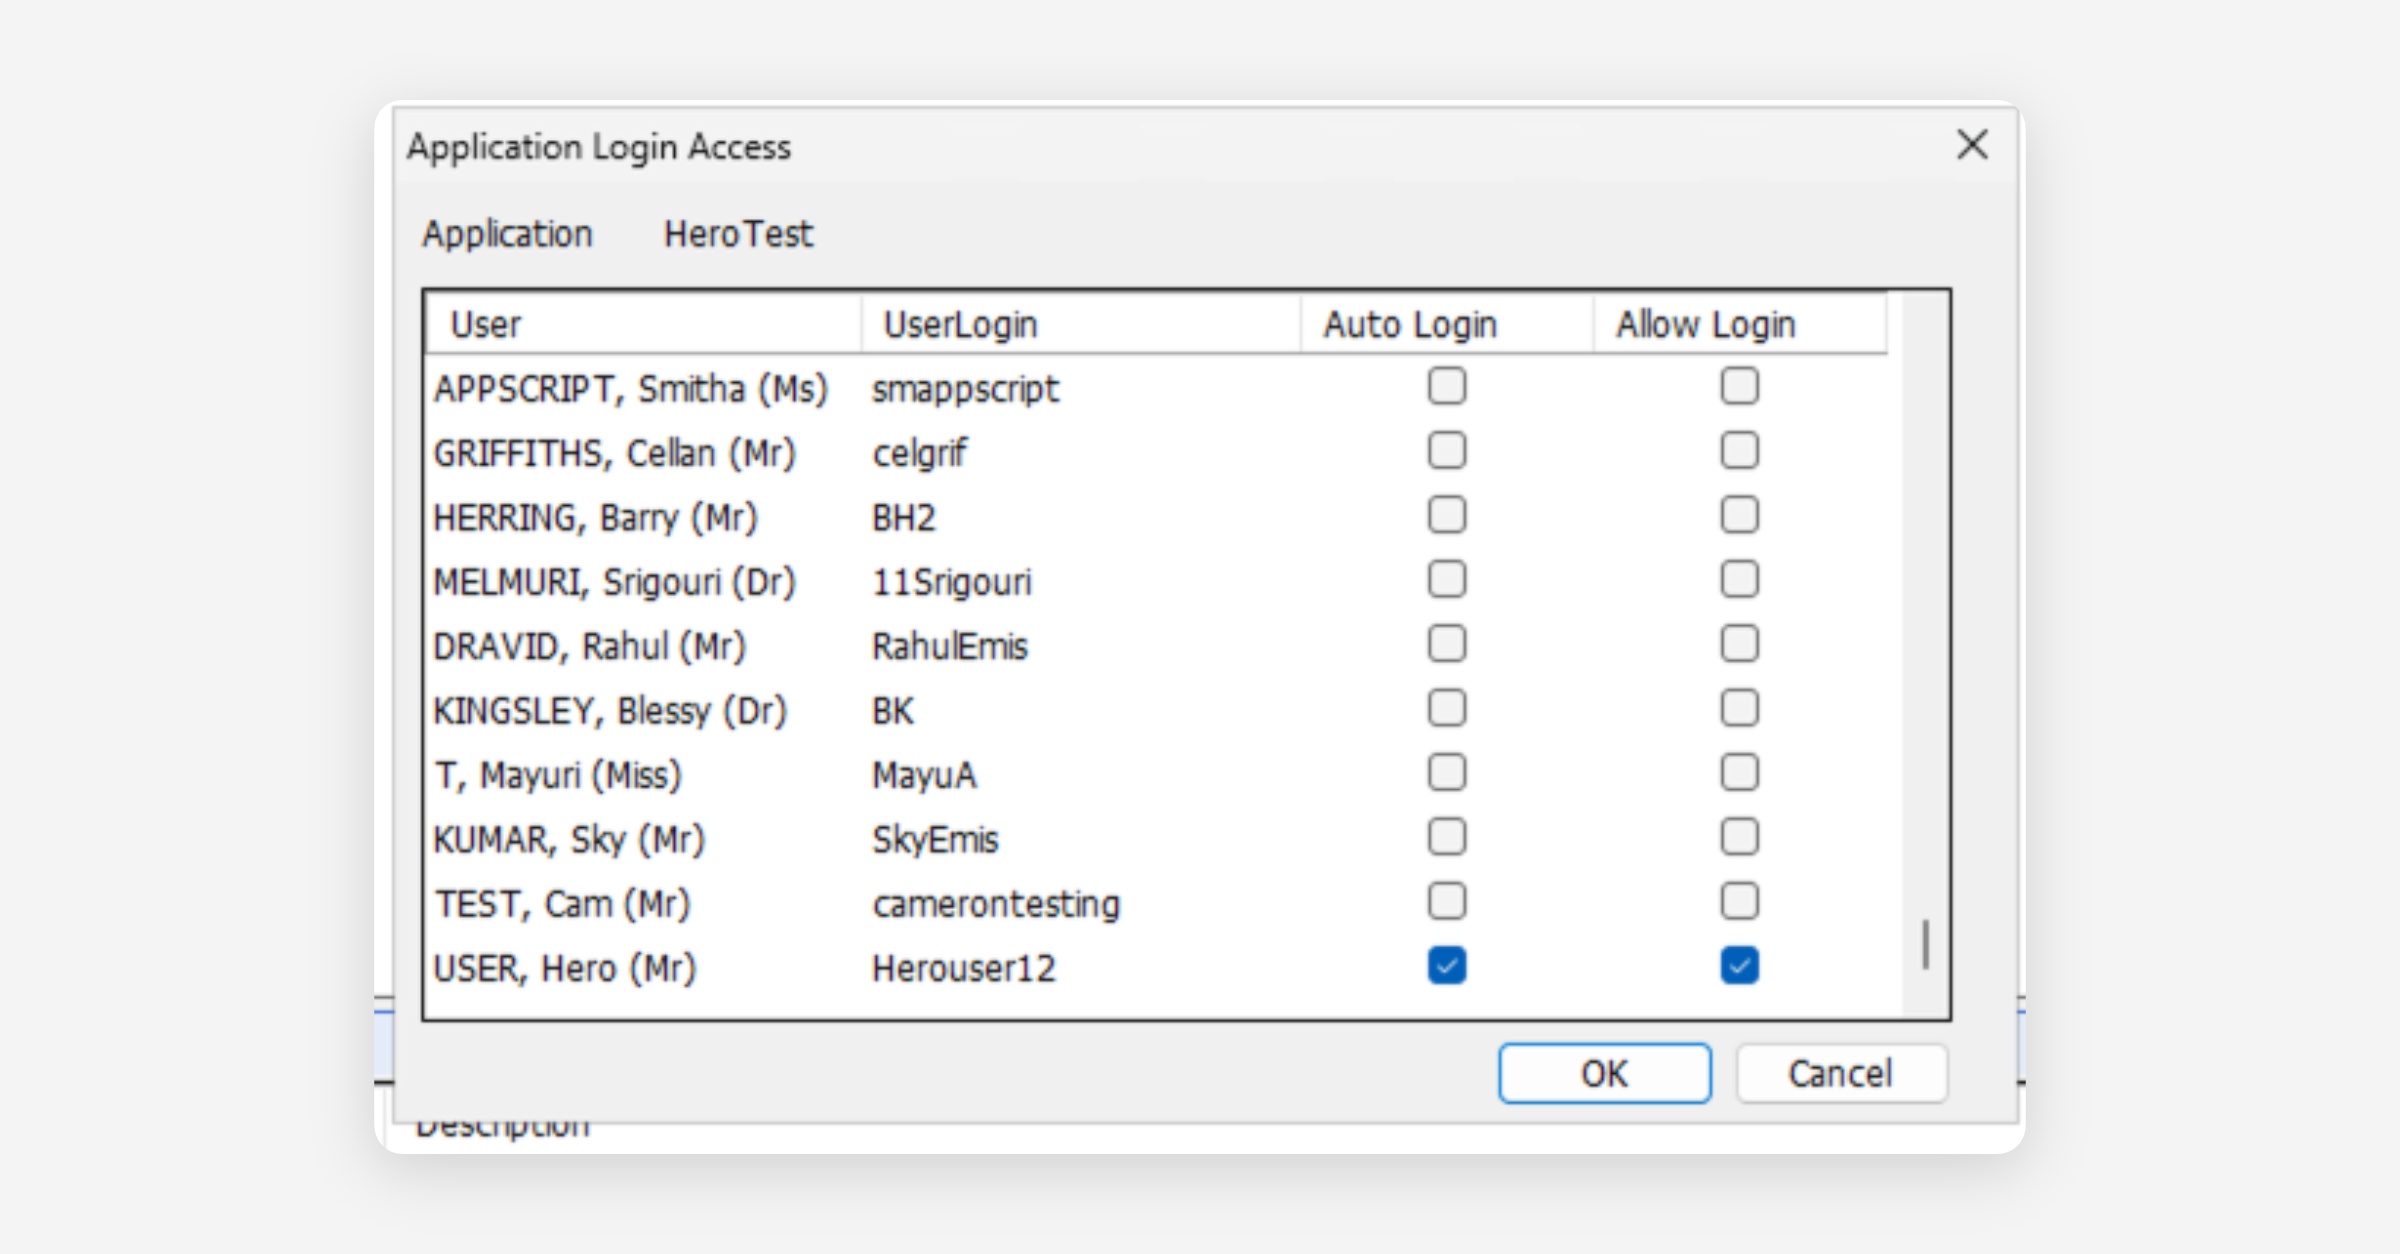
Activate login access
With Hero Health selected:
Click Login Access (toolbar)
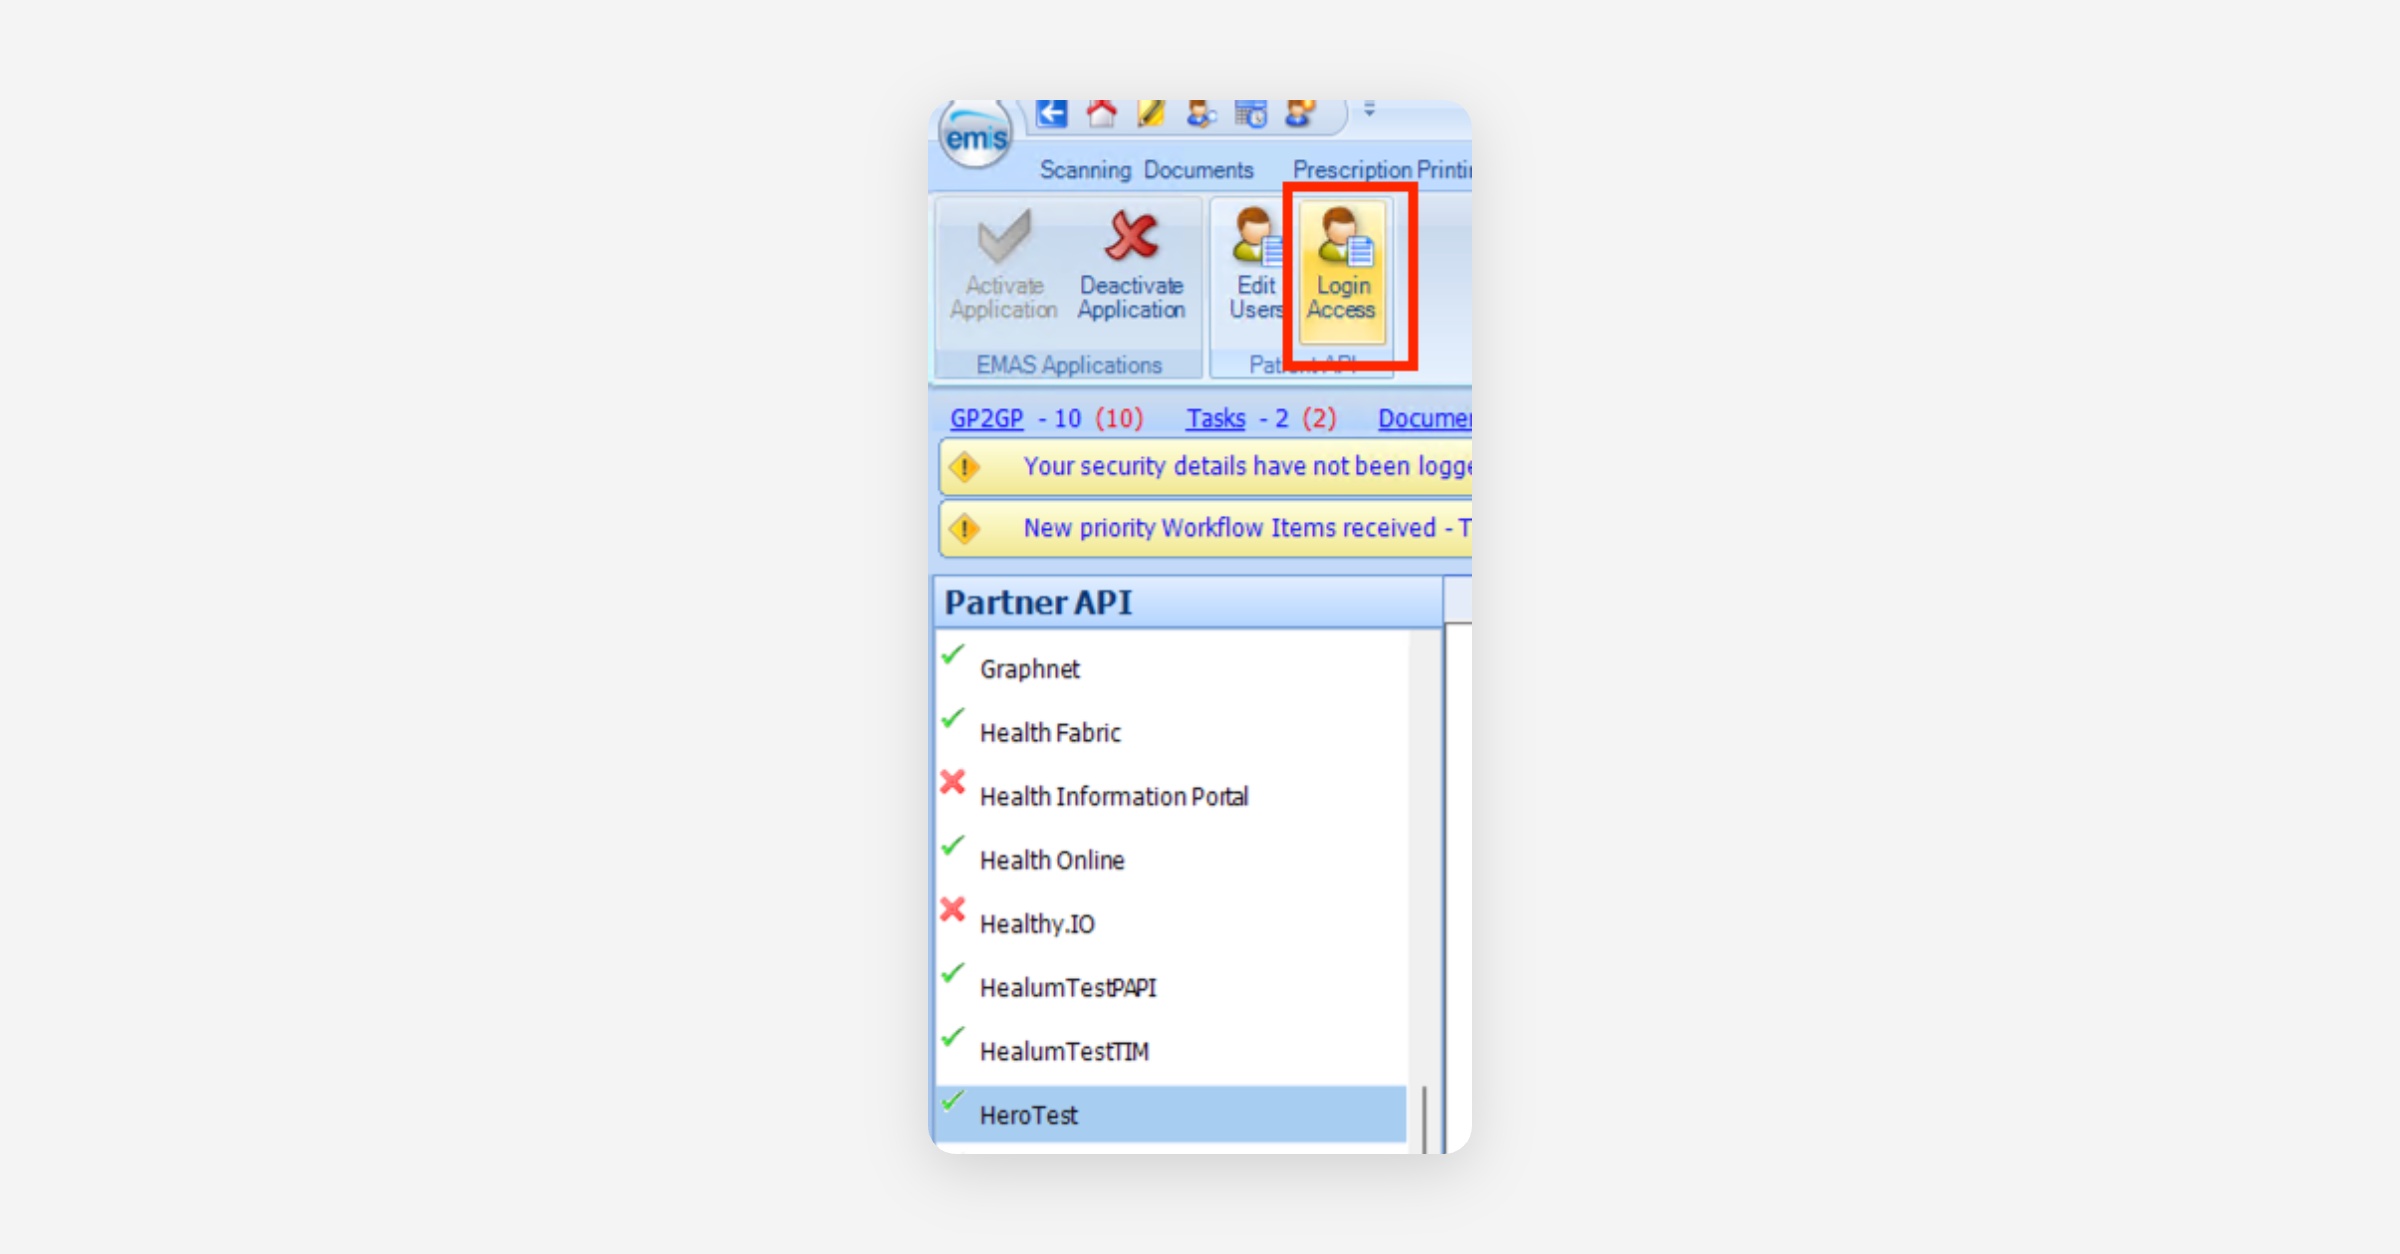
Find User, Hero
Tick:
Auto Login
Allow Login
Click OK
Second attempt only: deactivate & reactivate Hero Health
If you are repeating the setup because the first attempt failed:
In EMAS Manager, select Hero Health
Deactivate the application (if available)
Reactivate Application
Repeat:
Edit Users (set a fresh API password)
Login Access (ensure both boxes are ticked)
Final checks (MOST COMMON FAILURE POINT)
Before submitting the Hero connection form, triple-check:
No accidental spaces at the start/end
Correct capitalisation
You are using the API password (Step 2), not the EMIS user password (Step 1)
Step 3 of 3: Unregistered patients 'Slot type'
This slot type serves as a placeholder for bookings where a patient cannot be matched within your EMIS instance at the time of scheduling. The Hero Unregistered Patient Slot Type allows the booking to proceed and guarantees that the time slot is reserved in EMIS, while also creating a visual indicator to signal a pending verification or a required manual reconciliation process.
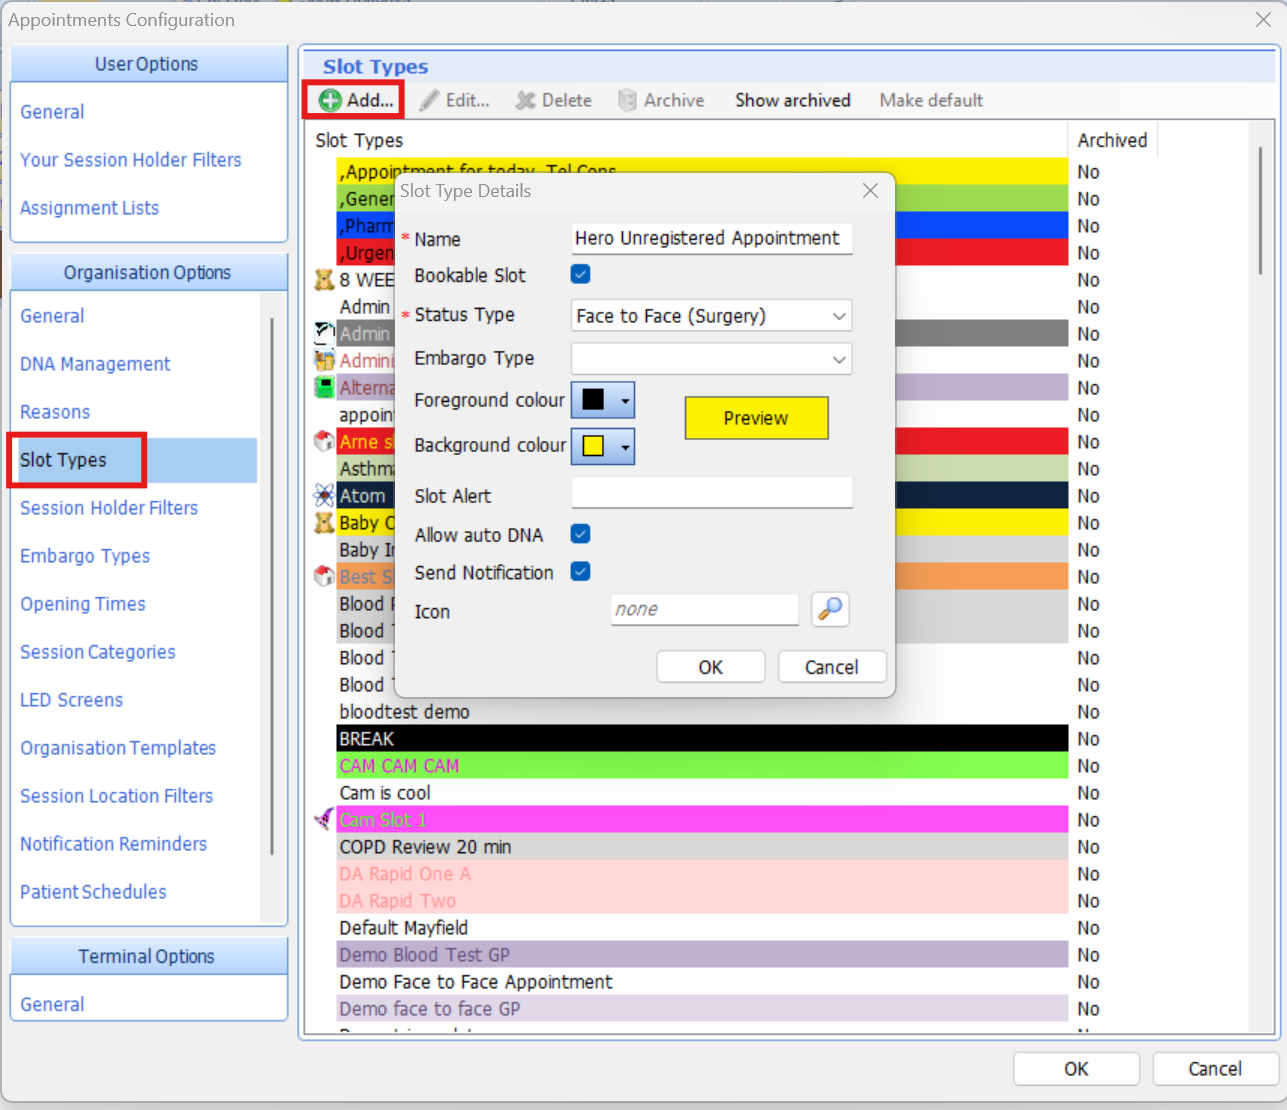
Create the slot type
Open the appointment book and click the Appts config button, this is found in the menu at the top of the appointment book.

Click on the slot type menu on the side of the window.
In the slot type menu, click Add. Now you can name the slot type "Hero unregistered patient".
Was this helpful?